Stamps
Predefined Stamps
pdfMachine comes with a set of predefined stamps that can be inserted into the PDF. You can also edit these to make your own stamp or change the appearance. Any annotation can be saved to the 'insert drawing' list to be used as a stamp at a later date. You can also load stamps from a file on your computer, or from a device such as your phone. You can customize and group annotations together to make a completely new custom stamp to your liking.
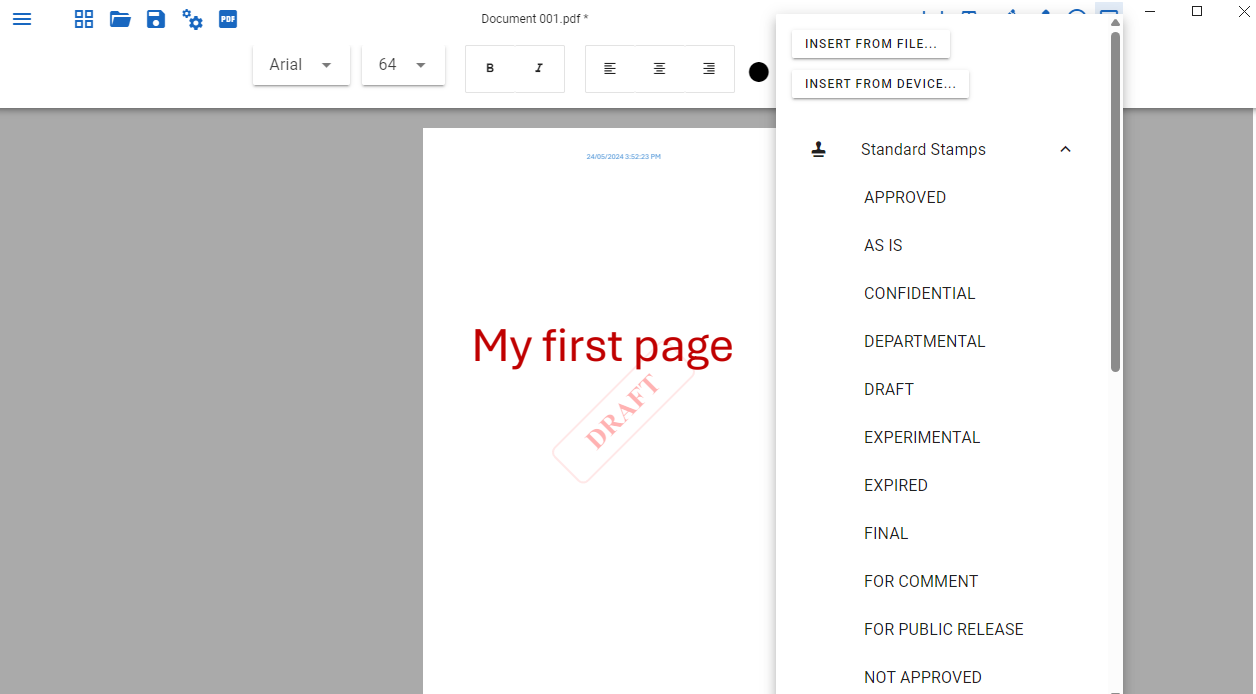
Stamps can be applied automatically upon print or when using the Windows Explorer right-click context menu. These stamps can even include variable data - such as the date and time. You can define how the time stamp is formatted. Read here for details. Set this up in pdfMachine options.
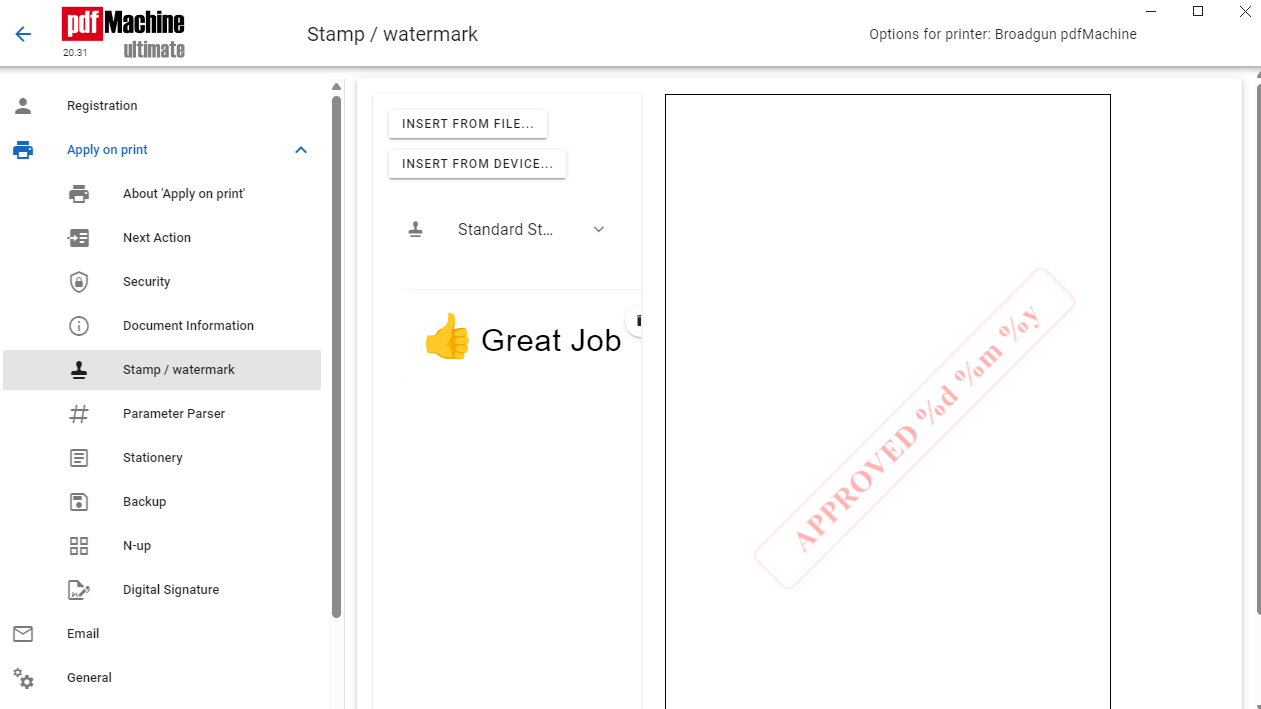
Load from file or device
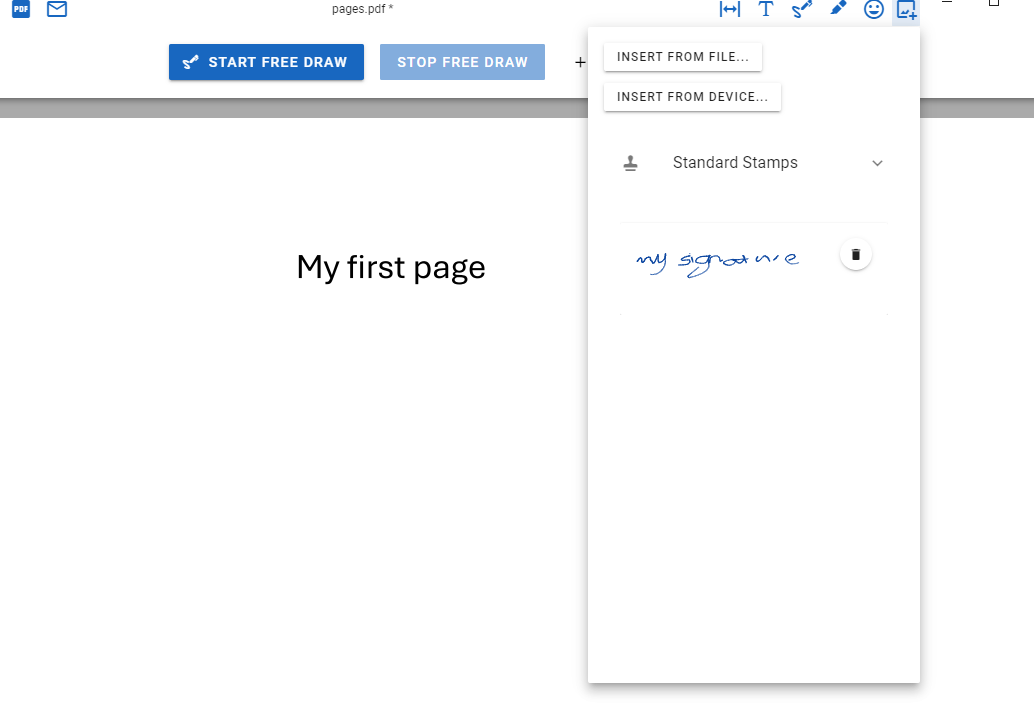
You can load an image stamp from a file or device (eg phone or tablet). The device can be used to load an existing image or as a signature pad to draw an image.
Choose from 'insert drawing' list
You can add any annotation you make to the 'insert drawing' list. At a later time you can then choose that same annotation from the list.
Customized Stamp Creation
pdfMachine allows you to insert a range of image and text annotations to create custom stamps. These annotations can be grouped together to form a more complex annotation, eg an image and text combined together. The custom stamps can then be inserted into a PDF or saved to an 'insert drawing' list. The saved stamps can then be used to insert into a PDF at a later date, or as an automatic stamp on PDF creation.
Custom stamps are created using the annotation toolbar. Image annotations can be drawn, inserted from file or another device such as your phone. Text annotations can be typed and formatted. Images and Text can be combined with a custom stamp. from your own device.
Grouping Items into a custom stamp
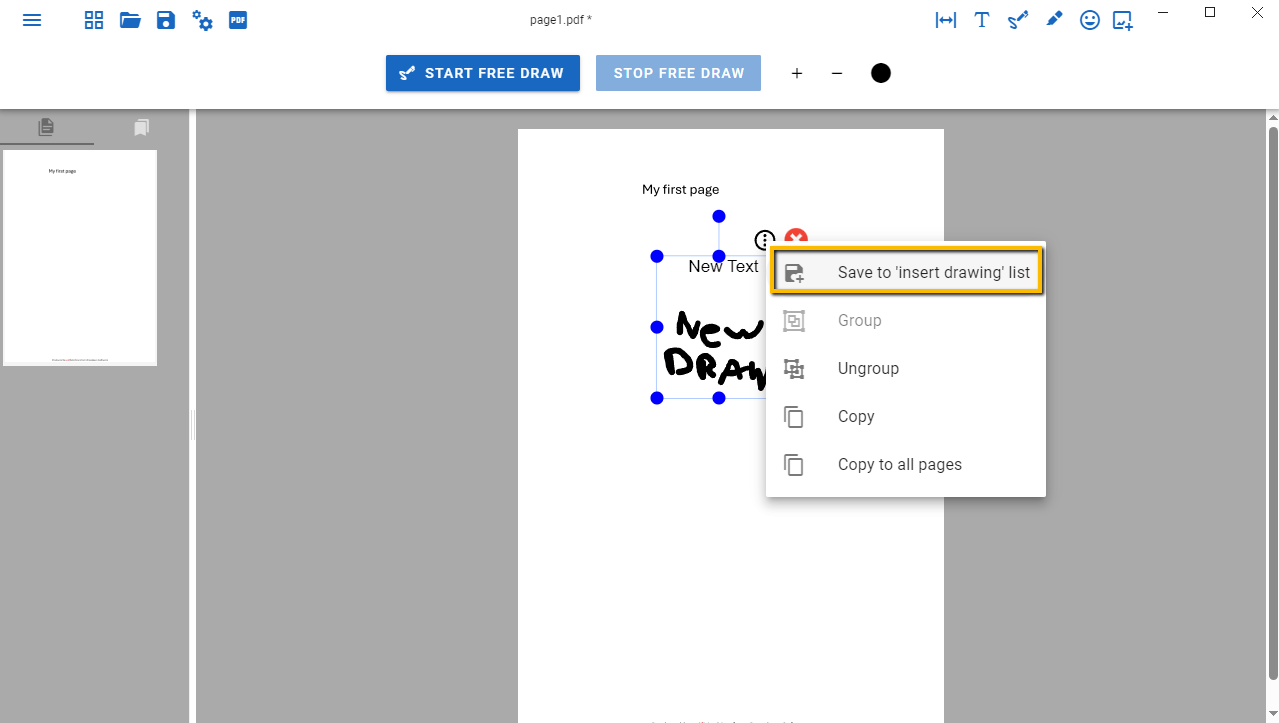
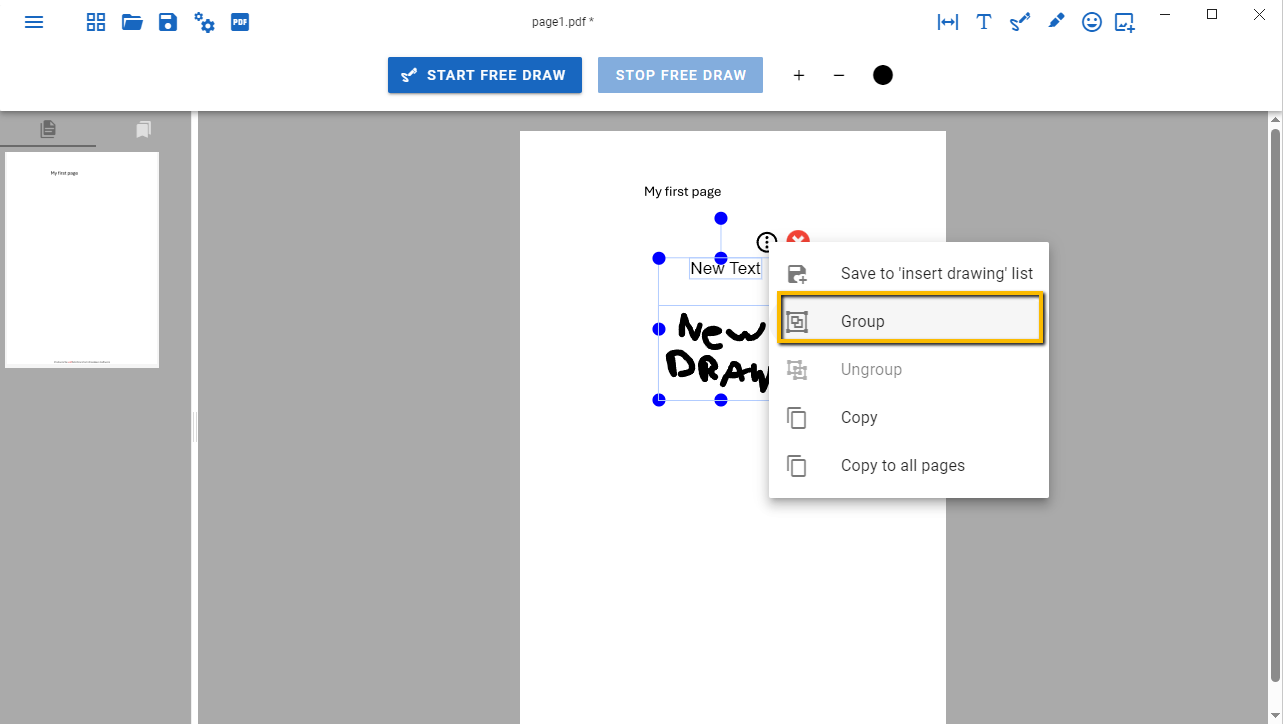
Items can be grouped together to form a custom stamp. This is done by selecting all the items to be grouped (by either dragging a selection box over them, or shift clicking them) and then selecting the 'Group' option from the right-click menu. The grouped items can then be moved, copy-pasted, resized and rotated as a single item.
Grouped items can be ungrouped by selecting the 'Ungroup' option from the right-click menu.
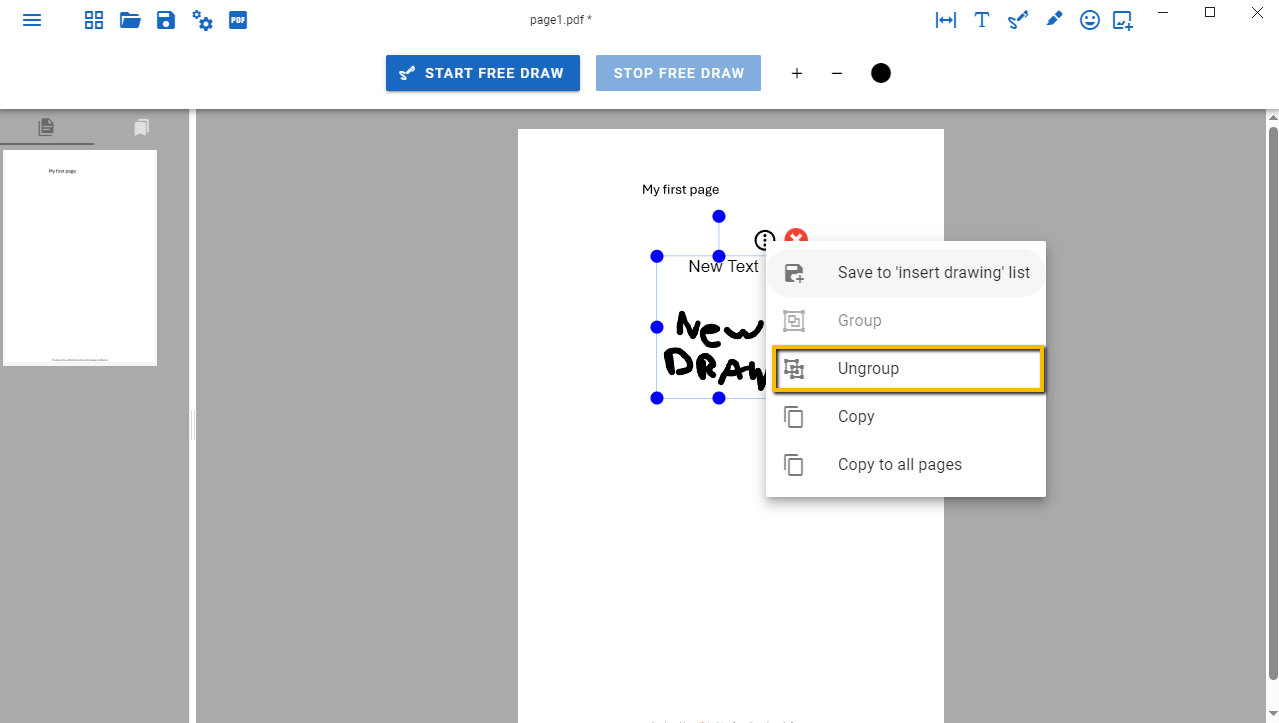
Once Grouped, items can be saved as a custom stamp by selecting the "Save to 'Insert Drawing' list" option.
